How To Make A Simple Game With Unity: Beginners Guide (Part 3)

👋 Hello, World! This is the final part of this mini-tutorial series today we will be covering some important parts like Menus, Music, etc.
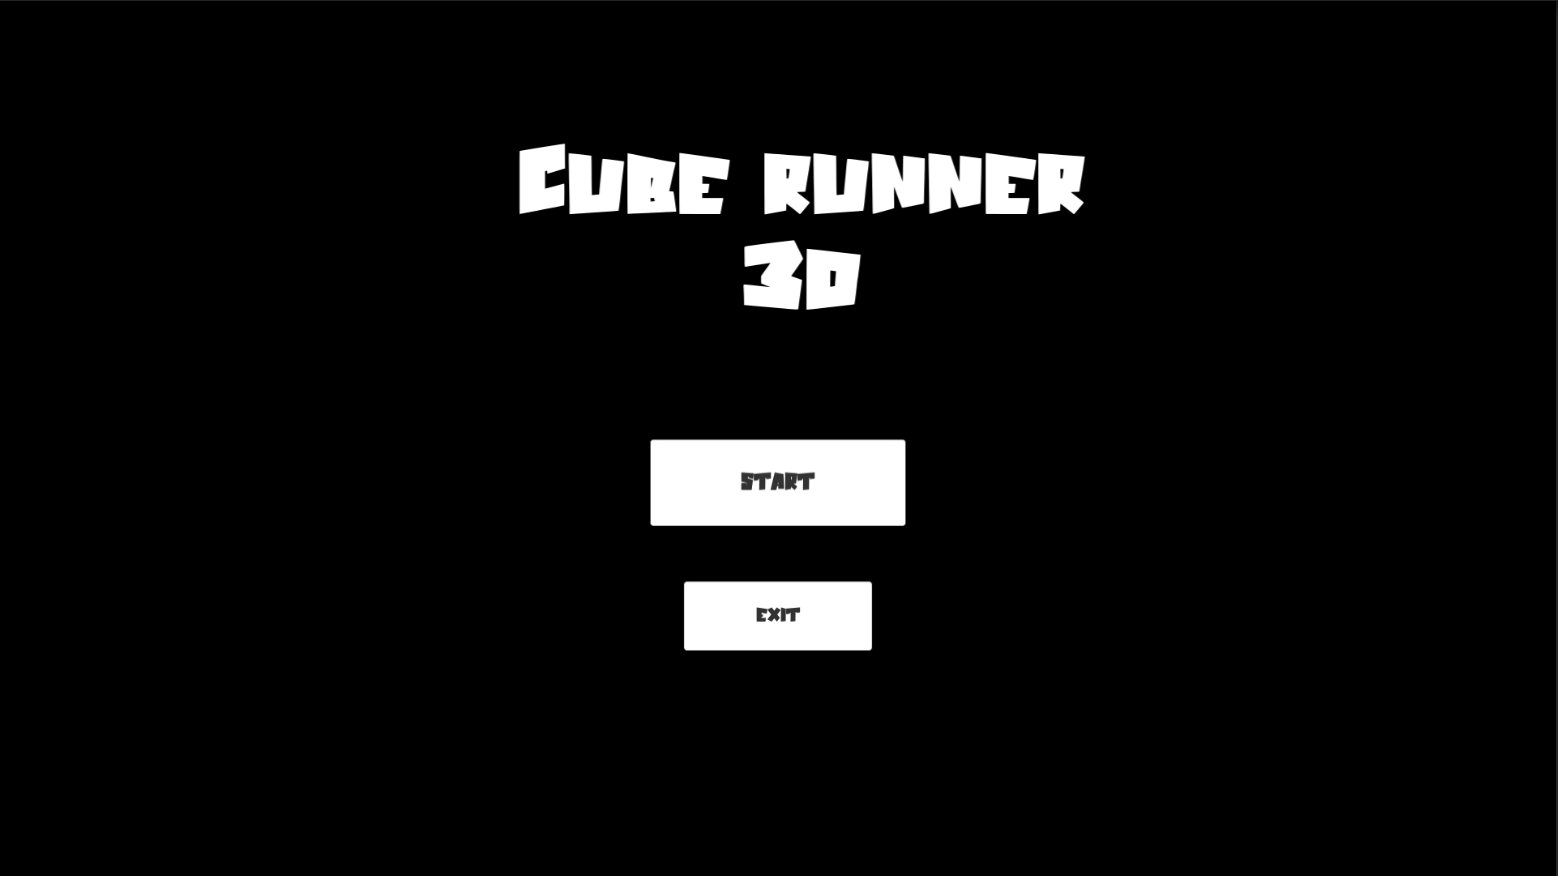
Creating the Start Menu 🌠
Go to "Scenes" folder, right-click > Create > New Scene. Call it "Start Menu". Go to the scene and create a panel.
- Add Text, "CUBE RUN" or anything you want.
- Beneath, create 2 buttons— "Start" and "Exit".
It may look like this now.
We create another script for these menus. Create a new script called "Menus".
    public void StartGame()
    {
        SceneManager.LoadScene("Level 01");
    }


    public void Exit()
    {
        Application.Quit();
    }
- Here we use the
SceneManagementnamespace too. - In
StartGame()function, we load the 1st scene in the build. - And in
Exit()function, we simply exit the game. This won't work in the editor.
Save the script, go to the editor and create a new empty object "ButtonManager" and the "Menus" script.
- add the
OnClickfunction to Start Button. Add "ButtonManager" to the Object and then in the dropdown, select GameManager > StartGame()
Dp the same things to the "Exit" button and add
Exit()function.
Everything should work now!
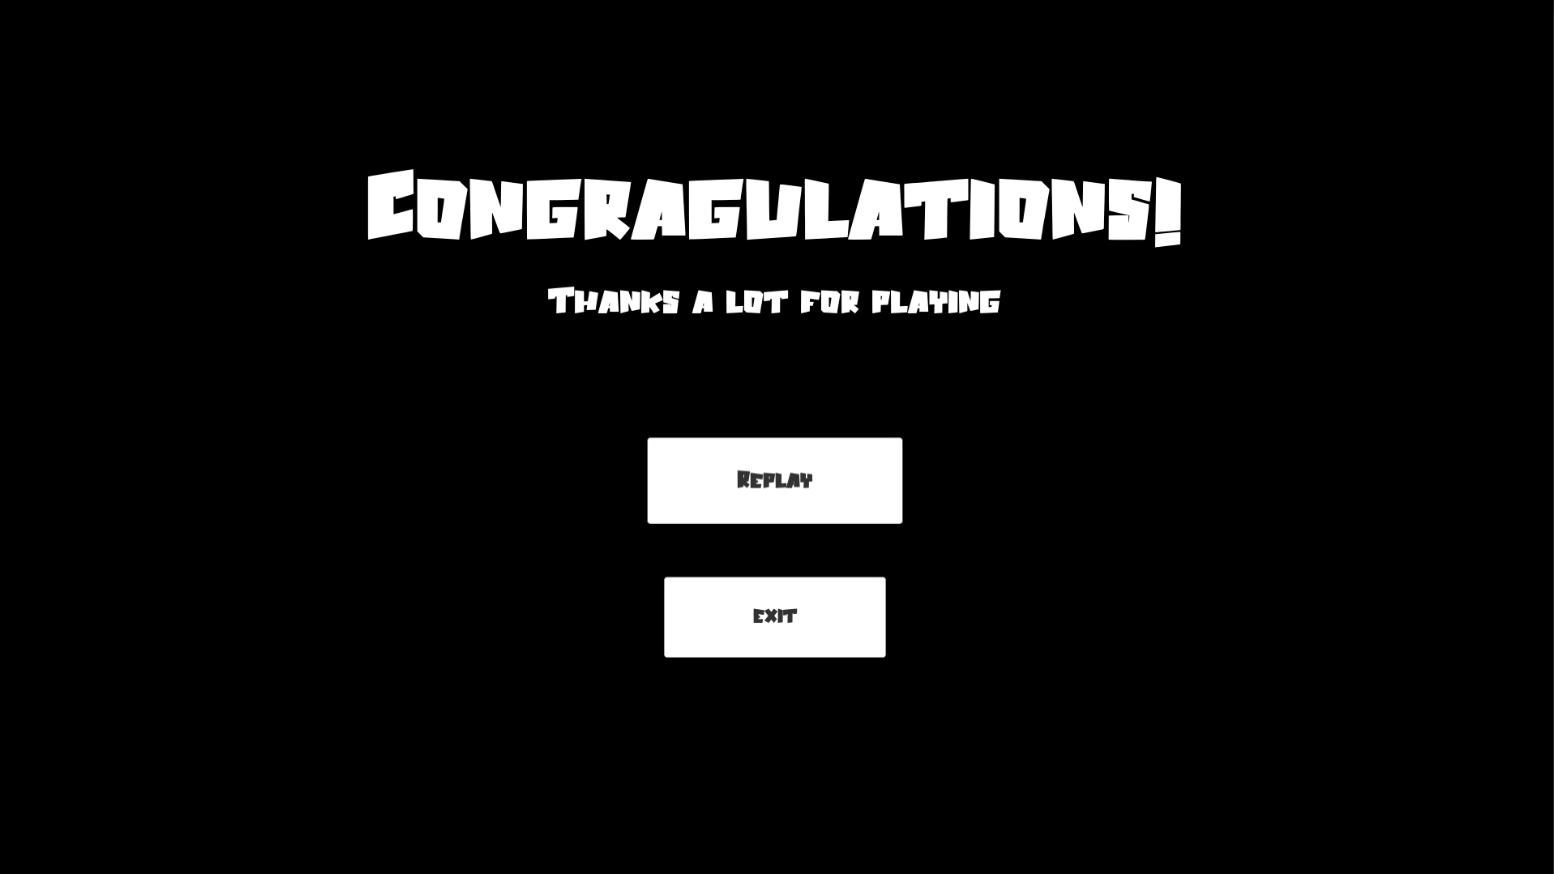
Creating The End Menu
- Duplicate the Start Menu scene and rename it as "End Menu".
- Change "CUBE RUN" to "Congratulations!".
- Then add some subtext saying anything you want.
- In the Start button, change the text to "Replay" and keep the "Exit" button as the same.
In the "Menus" script, add this restart function.
 public void Replay()
    {
        SceneManager.LoadScene("Start Menu"); //Or Level 01
    }
In here, Restart() is to Restart the whole game, so we should load Scene 01 in build settings with the help of amazing Scene Manager.
Save the script, and in the Replay button, just change the function to "Replay()". It won't work because we don't have added "Start Menu" to the build settings yet.
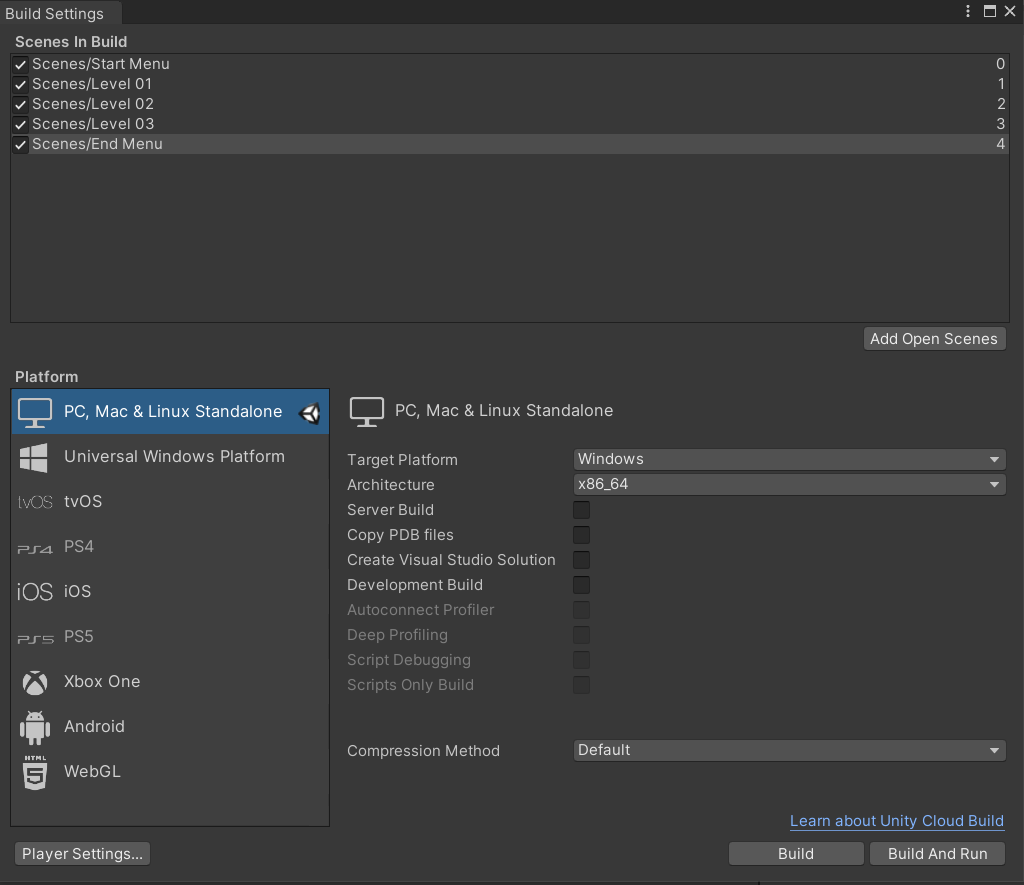
So now we have to add our just-built Menus to build settings. Go to file > Build setting. Drag and drop Start Menu to the beginning of the box, and End Menu to the end. Now it should look like this:
Adding Music
Download an mp3 file for background music. Add it to the Camera, so it will look like it.
Make sure to uncheck "Play On Awake".
Attach the music clip to the Main camera on every level and that's all about it.
Building the Game
Great, brilliant, and excellent! Now you can play the whole game from Start and test it. Then, again go to Build Settings. Now, all we have to do is Build the game. Select the platform (Here we build for PC) and click, "Build"!
Finally, YES!
After that, you will be asked for a folder. Create an empty one. If the build is successful, you will get a message in console like this:

Now go to the folder you selected, and open the game(gamename.exe). It will be opened and you can play it 🎮
That's just a one-game you made
And there's a lot to be made.
Congrats, now you've built your own game, I can't imagine how awarding it is. But this is not the destination, it's the start of an amazing journey. Good luck!
If you have any questions, about this game or anything, feel free to connect with me. My email is mrbuddesigner@gmail.com and I'm on Twitter as well (I'm not that active, anyways)
See you soon with another article! ✌