

How To Make A Simple Game With Unity: Beginners Guide (Part 1)

👋 Hello, World! Making your own game is something that is really awarding, but some people find it really hard to start to make one. Well, making a simple game is not that hard, all you need is some passion to start it and some effort.
Anyways, back to the topic. So in this series of articles (Actually 2 or 3), we're going to make a simple, hyper-casual game. This game is originally from Brackeys Cube Run Tutorial and we improve it a bit because this is only for educational purposes.
Before doing anything, we want to Install Unity Editor.
Installing Unity Editor
- Go to https://unity.com/
- Click on the profile icon at the left and Create a Unity ID.
- Then click "Get Started" and you will be in Unity Store.
- In Individual, choose Unity Personal
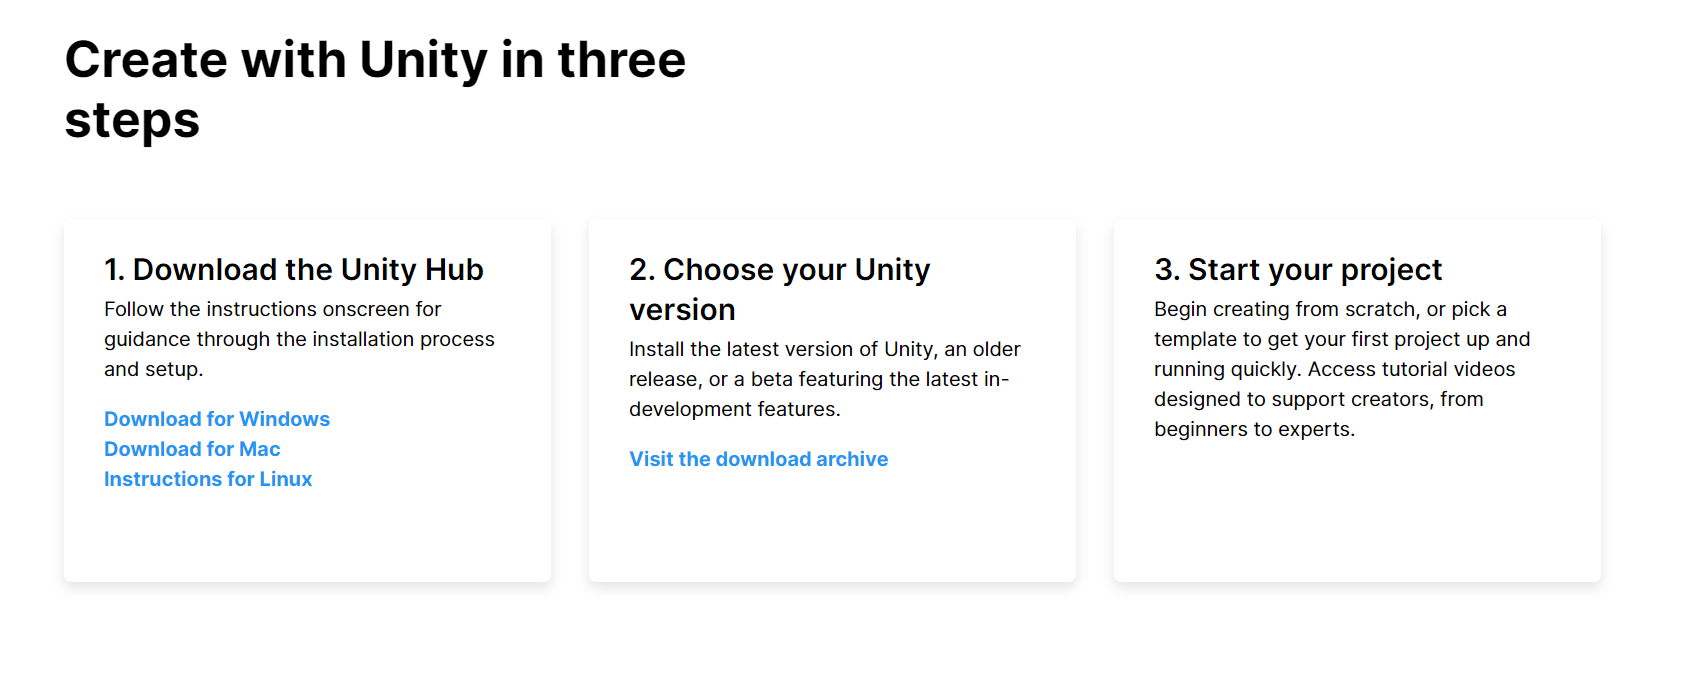
- Do the Three steps in there (Install Unity Hub, then the Editor)
Creating the Project
- After installing both Unity hub and the Editor, Head over to Unity Hub and click on "CREATE".
- In the window opened, use the 3D template and give a project a name.
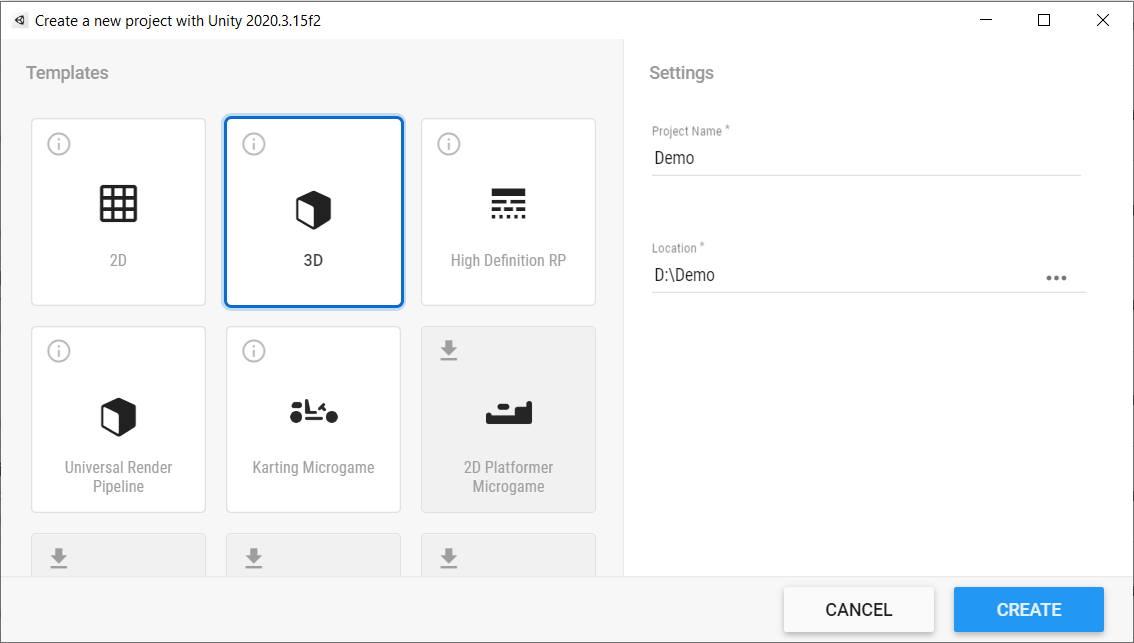
- Hit "CREATE", and the Unity Editor will be opened.
Practice the Editor 😏
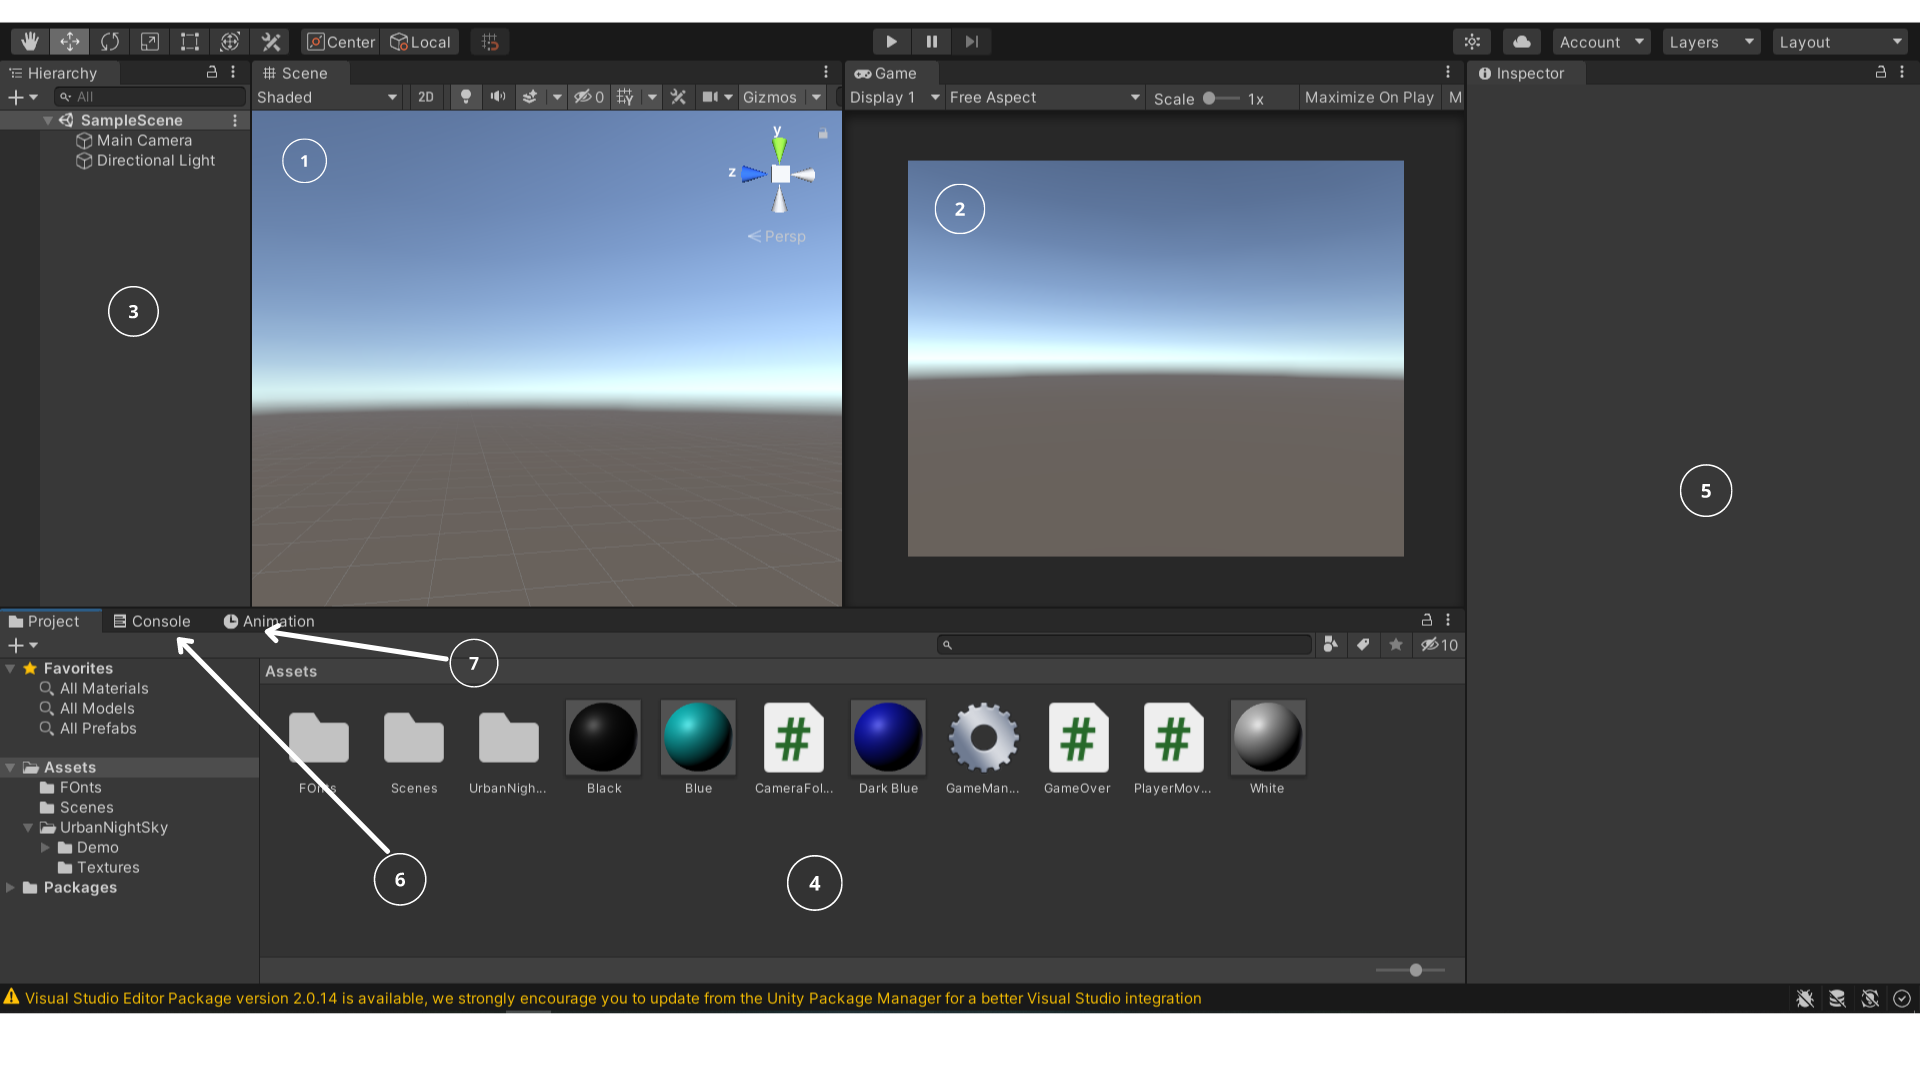
- Number 1: Scene View. This is where you build everything.
- Number 2: Game View. You can't do anything here except play the game.
- Number 3: All GameObjects in the scene are in there. If you select a game object in the hierarchy, it will also be selected in the scene view.
- Number 4: Project tab. Scripts, Prefabs, Materials, Sprites, Animations, Sounds, and all are in the Project window. All of these are 'Assets.'
- Number 5: Inspector. All the components(Scripts and others)added to a GameObject are in here. When a GameObject is selected in Hierarchy or in the Scene, all the components in that GameObject will show here.
- Number 6: Console window. Error messages, Debug.logs, Warning are shown here
- Number 7: Animation window. Great animations are built here.
Setting Up the Things
Well, there are already 2 GameObjects in Hiererechy— Main Camera and Directional Light. The game view depends on the Main Camera so you get it. Directional light is an essential thing in a game, simply we can call it as Sun. When there's no sun, everything is dark 👻
First of all, we should create the floor or the ground of the game where the Player is. It means we should create a cube- a cuboid!
Go to hierarchy and right-click. Create > 3D Object > Cube. In Inspector, Scale it like this: X-axis - 50, Y-axis - 5, Z-axis - 1000 (You can change it as you want, just some rough scales) so it should be like this 👇
Don't be afraid to adjust the Camera...
Next, we have to make the Player. Create a Cube the same way we did and scale it 4 x 4 x 4. Well, it's not clearly visible, right? It means, we have to add colors now. In Unity, we don't say colors; they're materials. To create a Material, go to the project tab and right-click> Create > Material. Then A Circle would be appeared, give it a name.
You can change the color as you want 🟥
Create a Black Material in the same way and drag and drop it to the ground. And for the Player, add Red Material. It should look better now.
Cool, but the skybox??
The Skybox you see is the default one. I agree it doesn't look good. 2 Options— Set Skybox a Solid color or Add another Skybox material. We go with the 1st option. Go to Main Camera and change Clear Flags from skybox to Solid color. Then tap the color box below and change the background color.
 Well, this looks good!
Get the Cube alive!
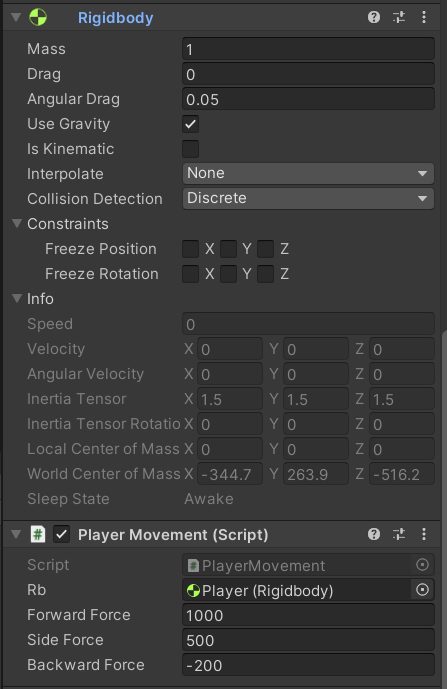
Not we should add movement for our Player. For this, we should add the Rigidbody component to the Cube. To do this, select our Player in Hierarchy, go to Inspector, Add Component > Rigidbody.
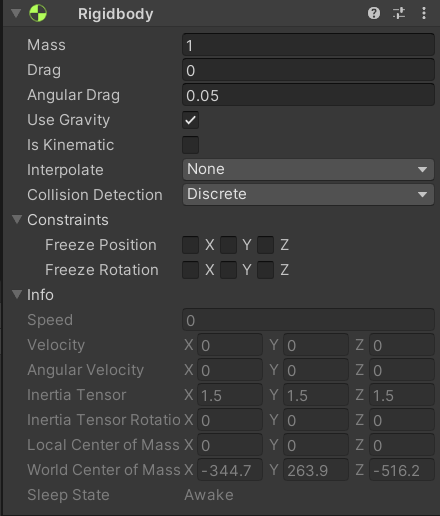
Rigidbody is a very essential component in almost every game. We can control Mass, Gravity, and many things of the GameObject by this. Don't be hesitate to play with Rigigdbody by making Gravity false, freezing positions, and anything! But be sure to reset them too 😆
To make the PLayer move, we should write a script. To write a script, we should create a script. Go to project tab > Create > C# Script. The name it as PlayerMovement(No spaces!) Right-click and the script will be opened in Visual Studio. (Download link in the References section.)
Don't be afraid of it, it's just easy.
First, let me show you the code, and then, I will break it down. Study it carefully first.
    public Rigidbody Rb; //Player's Rigidbody is used to add force towards it.
    public float forwardForce = 1000f;
    public float sideForce = 500f;
    public float BackwardForce = -200f;

    // Update is called once per frame
    public void FixedUpdate()
    {

        Rb.AddForce(0,0,forwardForce * Time.deltaTime); //0 and 0 is for X and Y axises
        if (Input.GetKey("d"))
        {
            Rb.AddForce(sideForce * Time.deltaTime, 0, 0, ForceMode.VelocityChange);
        }

        if (Input.GetKey("a"))
        {
            Rb.AddForce(-sideForce * Time.deltaTime, 0, 0, ForceMode.VelocityChange);
        }

        if (Input.GetKey("s"))
        {
            Rb.AddForce(0, 0, BackwardForce * Time.deltaTime, ForceMode.VelocityChange); //Backward force
        }

        if (Input.GetKey("w"))
        {
            Rb.AddForce(0, 0, 200f);//Here we can't add forwardForce variable because it will be a very high speed then.
        }
    }
- What we made first are variables. All of them are public, so they appear in Inspector of the GameObject that you add the script. Add the script to the Player (Just drag and drop) and see it yourself.
The purpose of this is that you can change the values themselves from Inspector so you don't have to adjust the script always.
- We change
void Update()tovoid FixedUpdate()because it is updating per a fixed time, not all the time. Ignore it, you will get it later. - By the first line of the function, we add a constant force to the GameObject by using its Rigidbody component. If you save the script and Play the game in the editor, you will see cube is moving forward. We're changing the force according to the Time, for the computer's speed. This is because every computer's speed is not same, but the time is.
- Then we make the Key Inputs. Remember the way of making forces— X, Y, Z.
- Save the script (Ctrl + S) and Add the Rigidbody component of the Object to the slot in Inspector.
- Play the Game and see how it works. If it's not fine, change the values and see!
- Cube is not going smoothly. We need Slippery nature on the Ground. Go to Project tab > Create Physics Material > Name it as "Slippery". Then drag and drop it to the Ground.
- It would go smooth but the cube is rotating. Let's freeze the rotation by Rigidbody's Constraints!

Everything's great! But the camera is in the same position. We want it to follow our Cube. To do this, create another script called "CameraFollow".
Make Camera To Follow The Cube
We need a few lines of code for the Camera to follow our Player.
 public GameObject Player; //To get Player's position
 private Vector3 offset; //Here we are keeping the distance of the camera and the player constant.


    void Start()
    {
        offset = transform.position - Player.transform.position;
    }


    public void LateUpdate()
    {
        transform.position = Player.transform.position + offset;
    }
- First, we make another public variable for our Player. It's to the Player's exact Position.
offsetis just a variable that will store a starting distance between player and camera. We subtract player position from the camera position, so we get the difference.LateUpdate() is called after all Update functions have been called. Here we need it because our Player's movement is in the
FixedUpdate()function. Unless we use LateUpdate(), we can't get the exact position.In the last line, we make the Camera's position the same as the Player's position + offset.
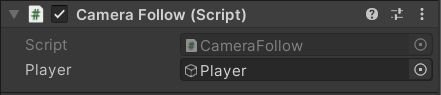
Now save the script and go to the editor. Add the script to the Main Camera and for the "Player" slot in Inspector, drag and drop the Player GameObject.
Hit PLAY and see how cool it is!
Obstacles! 🚧
So we have come to the final step in today's article, in Part 2, which will continue the same. Oh don't worry bud, it will be published in a day or two. Just Sign up for the newsletter so you will definitely get it.
Go to inspector > Create > 3D Object > Cube. Name it as "Obstacle" and scale it as you want. 12 x 5 x 2 for example. Right-click on it and click "Create an Empty Parent". By this, we can move, change or delete every obstacle by one click. Name the parent as "Obstacles". And the Obstacles are children of the Obstacles object.
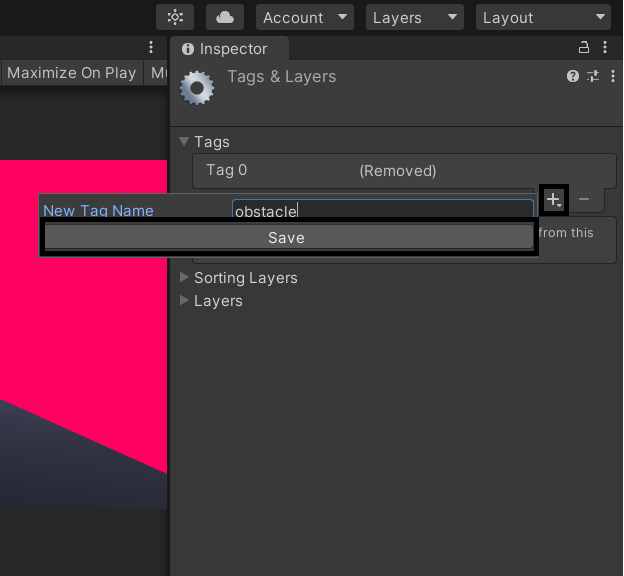
Now we should add a tag named "obstacle" to all the Obstacles. Click on the Obstacle you made and in the inspector, you see a Dropdown called Tags. Click on it and select "Add Tag".
Save it and add it to the obstacle. Now you have a thing to do while waiting for Part 2 of this tutorial. Create more & more obstacles and make it hard 😝
See you soon ✌ Make sure to subscribe to the newsletter so you won't miss Parts 2 and 3.

References
- Get Unity - https://unity.com
- Download Visual Studio - https://visualstudio.microsoft.com/vs/community/


